I don’t do “beauty”. I just wake up and wish the mirror had Photoshop. In search of my inner Zoella, this week I’m giving GEL NAILS a go…
Alright, you’ve caught me: I’m a fraud. Yes, I write for a women’s lifestyle, fashion and beauty blog but I’m not actually good at those things… or am I? This question can only be answered with time and wine. In my ongoing quest to understand the world of beauty, I am road-testing some of the most popular products, trends and styles that women dedicate their beauty routines to.
I’ll be sharing my thoughts with you during the entire process – the average jane with an amateur beauty habit is here (halp!).
First up – Gel Nails
Now what the frick are these?!
I first discovered that you can apply artificial nails on top of your actual nails when preparing for my Year 10 Formal. My best friend was keen to get hers done professionally, so I joined in too. All I remember is that they cost a bomb, took ages to dry and even longer to finally grow out. They also smelt pretty potent. I vowed to only apply nail polish – and nothing else – from then on.
Until I found SensatioNail Gel Nails, which does none of the above.
If you’re not sold simply by the name of this nail product (I can’t decide whether it’s a smooth or tacky pun) then it is worth a closer look. I’ve gone for the gel starter kit, which is for manicure and pedicure beginners like myself.
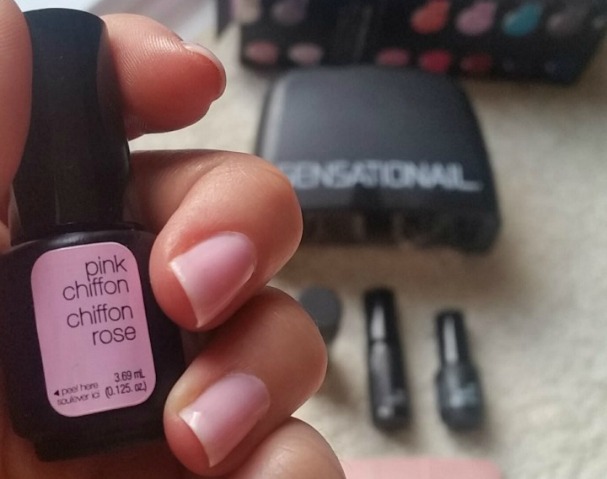
The colour is a softly named ‘Pink Chiffon’, which I figure will match nicely with autumnal shades such as camel, grey and teal.
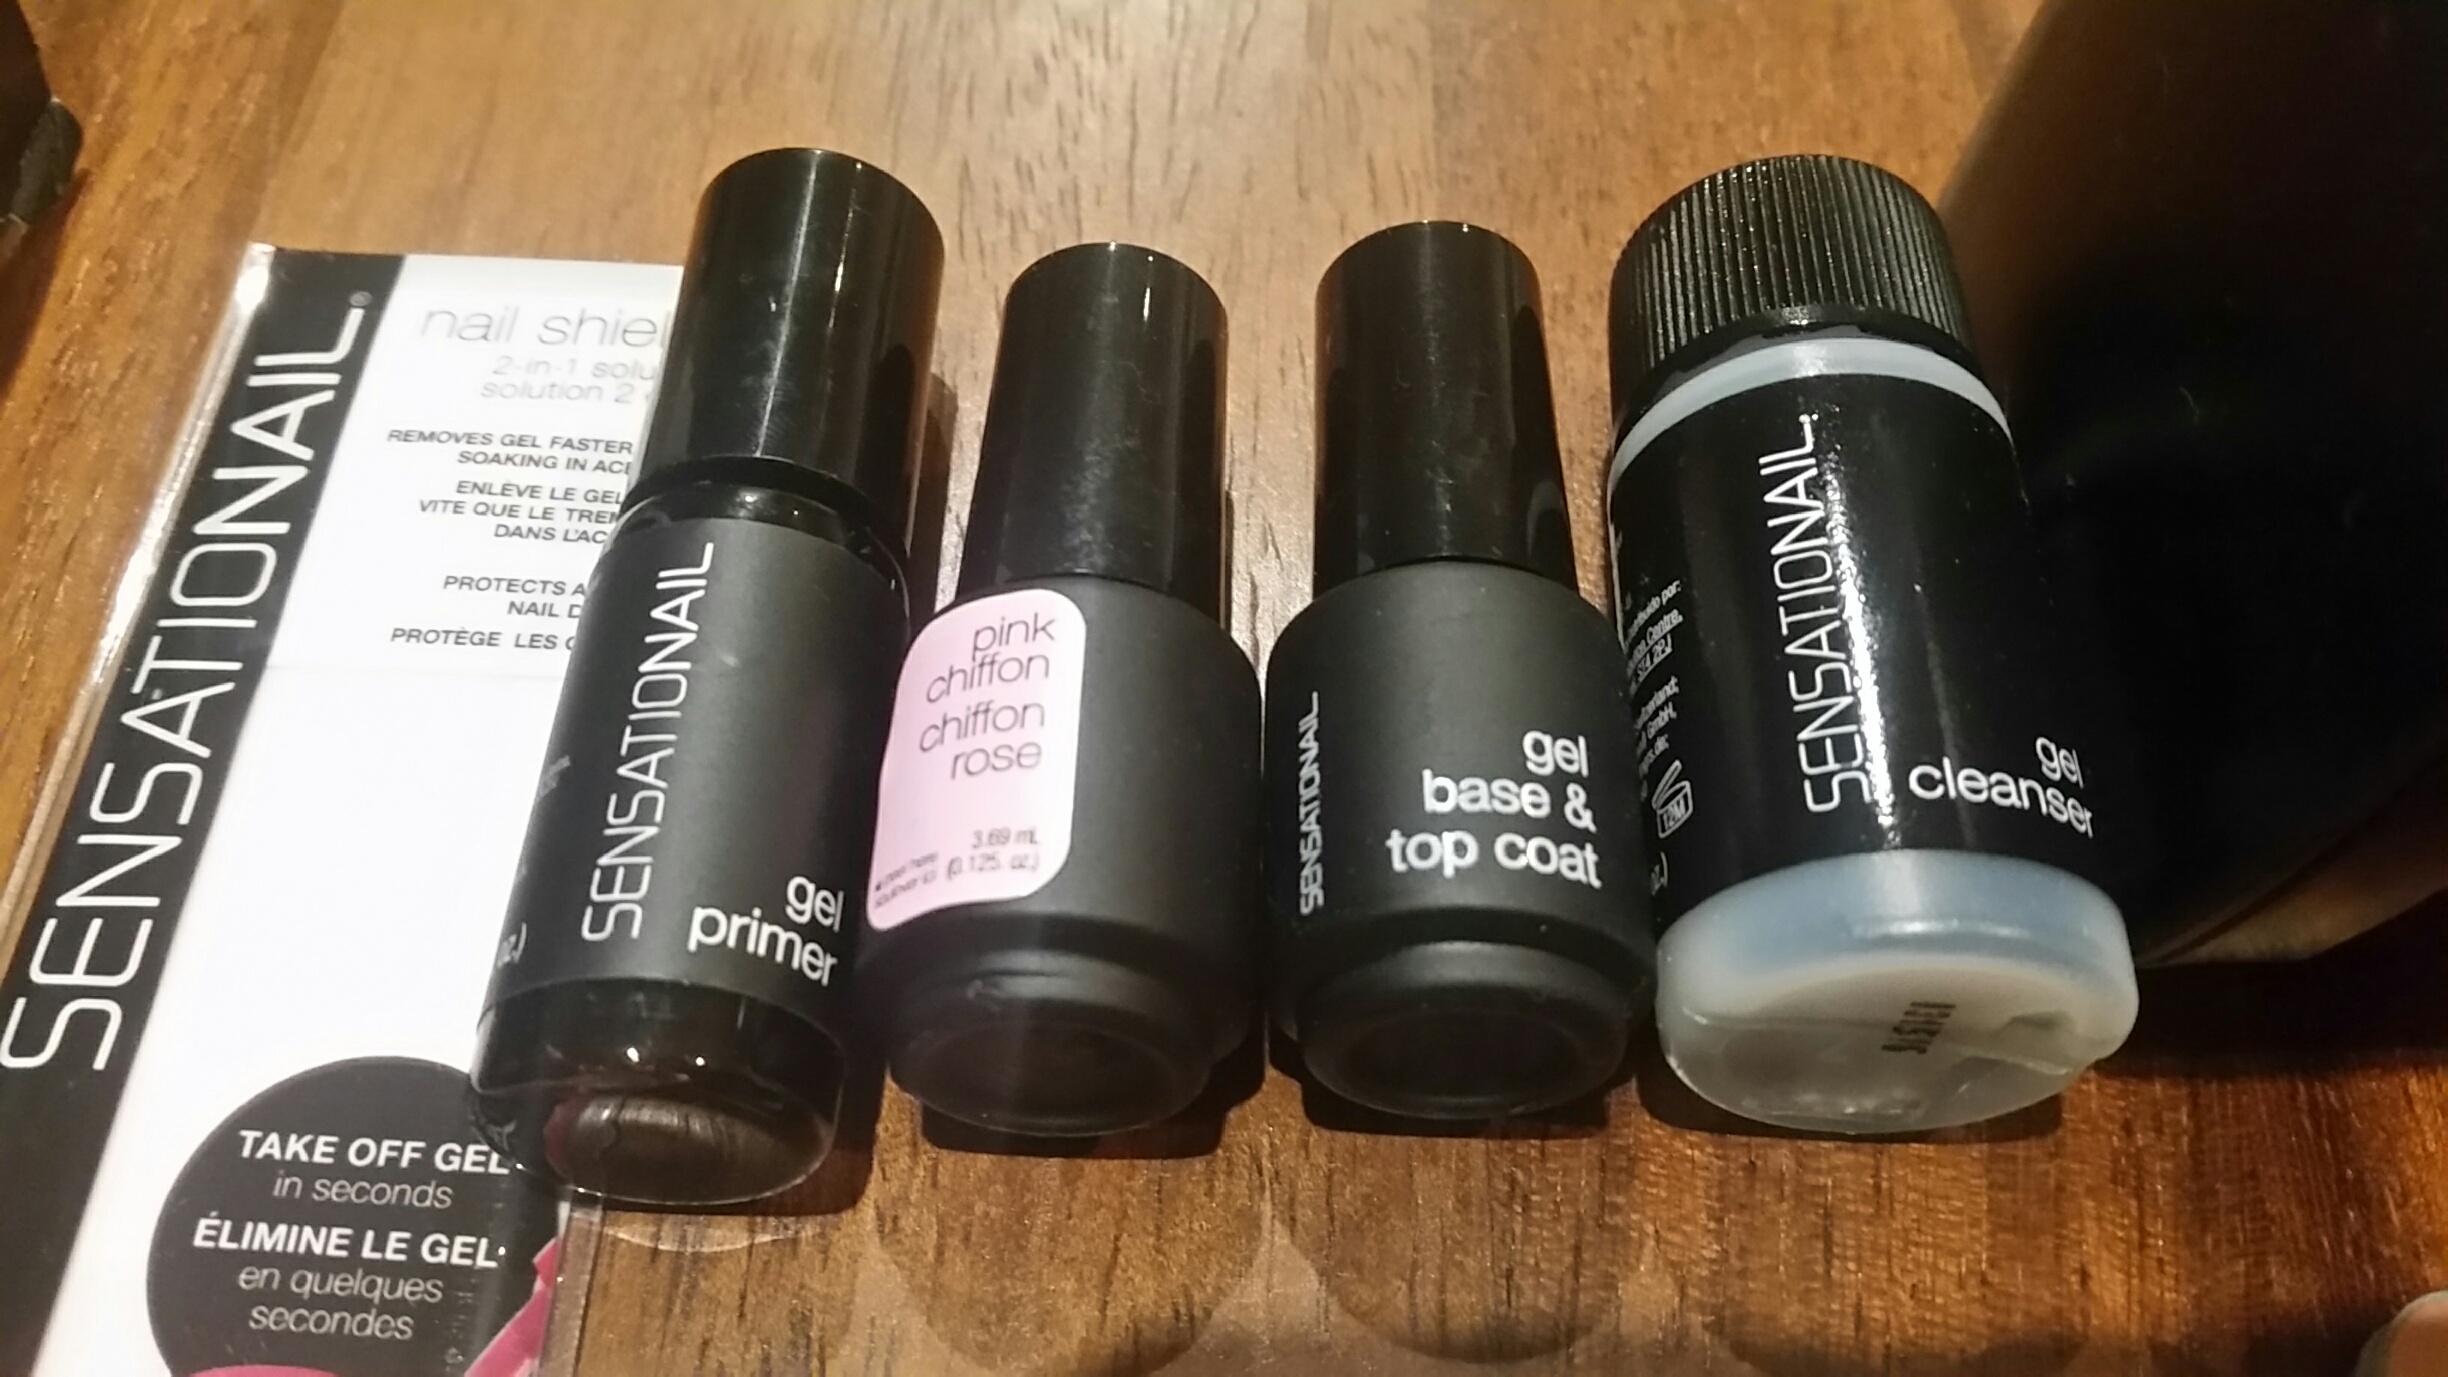
When opening the boxed gel nail kit, I am pleasantly surprised to see that everything I need is right there inside the box.

WHAT’S IN THE BOX?
* Pink Chiffon gel nail polish – pretty, feminine colour that reminds of cupcake icing
* Gel primer – this stuff goes on before the pink polish to help it stick
* Base/topcoat – this stuff goes on several times… I sort of lost count
* Gel cleanser – cleaned my nails up real shiny-like
* Lint-free wipes – excellent, as I hate when all that lint gets on my nails…
* Peel off nail shields – I found these useful things after my first application, so missed the boat!
* Double-sided nail buffer – everyone likes a good buff
* Manicure stick – more toothpick than salon style. Double usage I guess.
* LED nail lamp (USB & mains charger) – WOW this is like a mini disco for your fingers!
* How-to Booklet – thank goodness this was included, made it hard for even me to make mistakes.

My 7 STEP GUIDE:
- I lay the contents out before me on the table. It all makes sense, sure, but the main concept I struggle with is that I now have to take on being my own manicurist. Quite the responsibility. On the other hand, I am quite keen to use the mini finger disco LED lamp.
- After some buffing, wiping and tentative cuticle pushing, I have shaped my nails into what is commonly known as the ‘squoval’: a rounded oval hybrid that I never knew existed. Play School, you failed me.
- The next series of actions are methodical and precise. I do not want this gel stuff – which needs an LED light to dry – getting anywhere it shouldn’t. I am impressed, as the gel polish applies effortlessly with no brush strokes possibly, as it is slightly thicker than regular nail polish. Then it’s time for my nails to go clubbing…
- The LED nail lamp plugs in via a USB charger and takes a few minutes to heat up. I would suggest doing this prior to your painting. This little piece of kit is quite advanced and well worth the price of this starter kit. It is also the main reason that you don’t have to spend hours waiting for your gel nails to dry – the LED lamp dries the polish in just 30 seconds. Just sit through one of those cringey GoCompare adverts and before you know it your digits are dry! Freedom to press mute.
- The lamp also has a handy automatic sensor that turns on when your fingers enter the disco zone – obviously you have to play with this a bit before taking it seriously. Hand goes out, hand goes in. Hand goes out, hand goes in. The lamp is so thoughtful that it even flashes every 15 seconds so that you can keep tabs on your drying time.
- I follow the instructions (included in the pack) to a T. I prime, I polish, I coat. Paint, dry, paint, dry. The process becomes a little repetitive, but I can’t help but think that this is so much more relaxed than sitting in a fume-filled salon making small talk with a beauty therapist (who is probably daydreaming of Ryan Gosling anyway). I am in my pyjamas, sitting on the sofa, cup of tea to the left and SensatioNail LED gel nail lamp to the right.
- After the final dry, a polish is in order with the small lint-free wipes and I am staring at 10 beautifully manicured gel nails that I did completely on my own, at home, from a box. It was incredibly easy, almost unbelievably so, and I am a shining example that any average jane can complete this particular beauty regime.
The starter kit from SensatioNail apparently does 10x glossy manicures, but after two weeks wearing this pink colour, I’m kind of keen to see my nails nude again. Luckily, the kit contains instructions and the necessary tools for removal too.
You know this next bit is coming… I’m happy to say that when it comes to trying this beauty trend, I NAILED IT!
Starter Kits available from Boots stores or online via the SensatioNail website.